Connect Ledger Wallet to Ledger Live: Complete Pairing Guide
Step-by-step instructions for pairing your hardware wallet with Ledger Live
Pair Hardware Wallet with Ledger Live: Overview
Connecting your Ledger hardware wallet to Ledger Live application represents the essential first step enabling cryptocurrency management, portfolio tracking, and transaction capabilities while maintaining security advantages of offline private key storage. Whether you own a Ledger Nano X or Ledger Nano S Plus, the connection process is straightforward. The pairing process establishes secure communication channel between hardware device storing private keys and software application managing blockchain interactions, enabling users to view balances, construct transactions, and interact with cryptocurrencies while hardware wallet maintains exclusive control over cryptographic signing operations protecting assets. Understanding how to properly pair hardware wallet with Ledger Live ensures optimal security and functionality from device initialization through ongoing cryptocurrency management activities.
The connection process involves straightforward procedures designed for user-friendly experiences while incorporating security measures preventing unauthorized connections or malicious software from compromising device security. Ledger Live serves as official companion application providing unified interface for managing all supported cryptocurrencies, tracking portfolio performance, accessing staking opportunities, and conducting transactions across 5,500+ supported assets. The application runs on computers and mobile devices acting as intermediary between users and blockchain networks while hardware wallet maintains custody of private keys never exposing them to internet-connected software environments vulnerable to malware and remote attacks. This secure architecture is part of what makes hardware wallets the safest storage method for cryptocurrency.
Why Pairing Is Necessary
Pairing proves necessary because hardware wallets lack native interfaces for viewing balances, constructing transaction details, or browsing blockchain data requiring external applications providing these capabilities. Hardware devices focus exclusively on secure key storage and transaction signing, delegating all other functionality to companion software managing blockchain communication, address generation, balance queries, and transaction construction. This architectural separation enables devices to remain simple, focused security tools without complex networking capabilities that would expand attack surfaces while applications handle all internet-facing operations without accessing private keys.
The register hardware wallet Ledger Live process creates authorized relationship enabling hardware and software to work together seamlessly while maintaining security boundaries. Without proper pairing, hardware wallets cannot perform basic operations like checking balances or constructing transactions, making application connection fundamental requirement rather than optional convenience. The connection enables full cryptocurrency functionality while preserving hardware security model where keys remain isolated from potentially compromised software environments.
Connection Benefits
Proper pairing unlocks comprehensive functionality including unified portfolio management displaying all cryptocurrency holdings across different blockchains in single interface, real-time balance updates synchronizing current blockchain states without manual queries, intuitive transaction construction through user-friendly forms rather than command-line interfaces, staking opportunities enabling passive income generation, DeFi protocol integration for decentralized finance participation, NFT management for digital collectibles, and exchange integrations for buying cryptocurrency directly within application. These capabilities transform basic hardware security into complete cryptocurrency management platform.
The unified interface simplifies multi-cryptocurrency portfolio management eliminating needs for separate applications for different blockchains. Users can track total portfolio values, monitor price changes, review transaction histories, and conduct operations across all holdings through single polished application rather than juggling multiple specialized tools for different cryptocurrencies. This convenience proves particularly valuable for diversified portfolios spanning numerous blockchains and tokens requiring coordinated management through consolidated interfaces.
Register Hardware Wallet Ledger Live: Prerequisites
Proper preparation ensures smooth connection process without interruptions from outdated software or missing prerequisites.
Install Ledger Live Software
Begin by downloading Ledger Live application exclusively from official ledger.com website avoiding third-party download sites potentially distributing malicious modified versions compromising security. Navigate to ledger.com selecting appropriate version for your operating system—Windows, Mac, Linux, iOS, or Android. Desktop versions require installation through downloaded setup files following standard operating system procedures. Mobile versions install through official App Store or Google Play listings published by Ledger SAS verified through developer credentials.
After installation completes, launch Ledger Live accepting initial setup prompts and privacy preferences according to personal comfort levels with anonymous usage analytics. The application performs initial configuration downloading necessary components and preparing for first hardware wallet connection. New users encounter onboarding tutorials explaining basic application navigation and functionality, though these can be skipped by experienced users already familiar with Ledger ecosystem.
Update Device Firmware
Before attempting connection, ensure hardware wallet runs current firmware version providing latest security improvements, feature additions, and bug fixes. For new devices, firmware typically requires immediate update after first connection, while existing devices might need periodic updates maintaining compatibility with newest Ledger Live versions. Firmware updates deliver critical security patches addressing discovered vulnerabilities, add support for new cryptocurrencies, and improve device functionality through refined implementations.
Check current firmware version in device settings comparing against latest releases published on Ledger's website or through Ledger Live notifications. Firmware update procedures vary slightly by device model but generally involve connecting device to Ledger Live, navigating to Manager section, and following guided update process requiring device confirmation through button presses. Never interrupt firmware updates once started to prevent potential device corruption, and always verify genuine firmware sources preventing malicious firmware installation attempts.
Prepare Your Device
For Ledger Nano X with integrated battery, ensure sufficient charge before beginning pairing process preventing interruption from power depletion. Connect device to USB power source using included USB-C cable allowing 1-2 hours for complete charge from depleted state, though partial charge sufficient for initial connection provided minimum 20% battery level. Battery indicator displays on device screen showing current charge status.
Ledger Nano S and Nano S Plus lack integrated batteries instead drawing power directly from USB connections during operation, eliminating charging requirements but necessitating continuous USB connection throughout usage. For all models, ensure USB cables function properly and USB ports provide adequate power avoiding unpowered hubs potentially supplying insufficient current for stable device operation affecting recognition and operational stability during pairing.
Set Up Nano X on Ledger Live: Step-by-Step
Systematic procedures ensure successful device registration establishing secure communication enabling cryptocurrency management.
Step 1: Launch Ledger Live
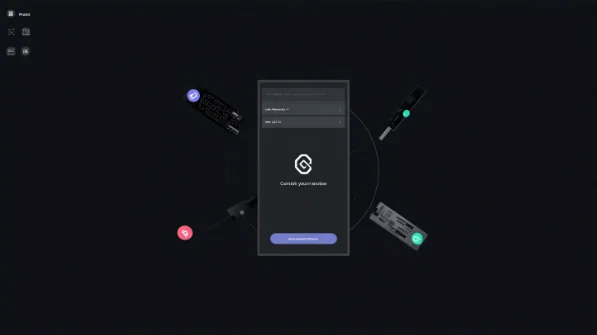
Open Ledger Live application on computer or mobile device ensuring application fully loads displaying main interface. For first-time setup, application guides users through initial configuration including language selection, terms of service acceptance, and basic settings configuration. Existing installations skip initial setup proceeding directly to main interface showing portfolio overview, account listings, and navigation menu.
Navigate to device connection interface typically accessed through "Get Started" button on fresh installations or "Add Device" option in settings for existing installations preparing to connect additional devices. The application displays connection instructions tailored to selected device type—Nano S, Nano S Plus, Nano X, or Stax—providing model-specific guidance optimized for respective device capabilities ensuring appropriate procedures for hardware variant being registered.
Step 2: Choose Connection Method
For devices supporting multiple connection methods like Nano X with both USB and Bluetooth, select preferred connection method based on usage scenario and device availability. USB connection provides universal compatibility, fastest connection establishment, and works regardless of Bluetooth capability on host devices making it preferred for desktop workflows and troubleshooting. Bluetooth enables wireless convenience particularly suited for mobile device pairing and cable-free operation.
Other Ledger models support USB-only connectivity eliminating connection method choice but simplifying setup procedures. The application displays appropriate instructions for selected connection method including cable connection procedures for USB or pairing mode activation for Bluetooth guiding users through device-specific requirements ensuring successful connection regardless of hardware model or chosen connection approach.
Step 3: Connect Device
For USB connection, plug cable into device and computer USB port ensuring secure physical connection without loose cable seating potentially causing intermittent connectivity. For Bluetooth pairing with Nano X, enable Bluetooth on both device and computer/smartphone, initiate pairing mode on Nano X through device settings, and select device from available Bluetooth listings on computer confirming pairing code matches displays on both screens.
Ledger Live detects connected device displaying recognition message and prompting for next steps. Device screens may display connection confirmation messages or specific instructions requiring user acknowledgment through button presses. If device fails to appear after several seconds, troubleshoot connection following procedures addressing common detection failures from driver issues, cable problems, or software conflicts preventing proper device recognition.
Step 4: Enter Device PIN
With device connected, hardware wallet prompts for PIN code entry if device already initialized during previous setup. Enter PIN using device buttons navigating number pad interface selecting each digit through button presses and confirming entry completing authentication demonstrating authorized device access. Incorrect PIN attempts increment counter limiting total attempts preventing brute force attacks, with three consecutive failures resulting in device reset requiring recovery phrase restoration.
For brand new devices not yet initialized, setup process includes creating new PIN during initial configuration choosing 4-8 digit code balancing security strength against memorability. Select PIN carefully avoiding obvious patterns like 1234 or repeated digits reducing security effectiveness. After successful PIN entry, device may prompt for permission to allow Ledger Live connection. Review permission request on device screen and approve through physical button confirmation establishing trusted communication channel.
Pair Hardware Wallet with Ledger Live: Connection Methods
Understanding different connection options helps users select optimal methods for specific devices and usage scenarios.
USB Connection Guide
USB wired connection provides universal compatibility across all Ledger devices offering reliable data transfer and simultaneous device power delivery for models without integrated batteries. Connect device to computer using included cable ensuring secure connection to motherboard USB ports rather than front panel or hub connections potentially providing insufficient power or unreliable data connections. USB provides fastest connection establishment, eliminates wireless interference concerns, and works regardless of Bluetooth capability making it preferred method for desktop workflows.
The wired connection particularly suits users prioritizing maximum security through eliminating wireless attack surfaces, though encrypted Bluetooth implementation provides equivalent security for properly configured connections. Cable quality significantly impacts connection reliability with included genuine Ledger cables providing optimal performance, while third-party alternatives might introduce compatibility issues. For users experiencing connection difficulties, trying different USB cables and ports often resolves issues from cable defects or port problems.
Bluetooth Connection Guide (Nano X)
Bluetooth wireless connectivity exclusive to Ledger Nano X enables cable-free mobile device pairing. Enable Bluetooth on both Nano X device and smartphone through respective device settings, initiate pairing mode on Nano X through device menu, and select device from available Bluetooth listings on smartphone. Verify pairing codes displayed on both device and smartphone screens match preventing man-in-the-middle attacks from nearby devices attempting unauthorized pairing, then confirm pairing completing encrypted wireless connection establishment.
Bluetooth connection maintains equivalent security to USB through encrypted communications channels preventing eavesdropping and mutual authentication preventing unauthorized connections. The wireless convenience particularly benefits mobile workflows enabling on-the-go transaction approvals without cable requirements. Users can disable Bluetooth entirely when unnecessary through device settings, and Bluetooth automatically disconnects after idle periods conserving battery and limiting wireless exposure to active usage sessions only.
Learn more about the Ledger Nano X Bluetooth features.
Register Hardware Wallet Ledger Live: Device Recognition
After successful connection, completing device registration enables full cryptocurrency management capabilities.
Allow Device Manager
First connection triggers automatic genuineness check where Ledger Live verifies authentic firmware through cryptographic attestation ensuring device hasn't been compromised with unofficial firmware potentially containing malicious modifications. Successful genuineness verification confirms authentic Ledger device with official firmware, while failures indicate potential counterfeit hardware or unofficial firmware requiring immediate investigation before proceeding. Never ignore genuineness check failures or continue using devices failing authentication as this indicates serious security compromises.
The application may request permission to access device manager enabling communication with hardware wallet. Approve this permission allowing Ledger Live to query device for public keys, request transaction signatures, and perform other operations while maintaining hardware control over private keys never exposing them to software environment. This authorization creates ongoing relationship allowing normal application operations while preserving security boundaries preventing unauthorized access to sensitive cryptographic material.
Install Apps
Navigate to Manager section in Ledger Live displaying available cryptocurrency applications installable on connected device. Browse extensive application catalog searching for specific cryptocurrencies or browsing by category finding Bitcoin, Ethereum, Cardano, or thousands of other supported assets. Click Install buttons for desired applications initiating transfer to device storage consuming allocated space from available capacity. Device displays installation progress requiring confirmation through button presses approving each application installation.
Storage limitations particularly on original Nano S require managing installed applications carefully uninstalling unused apps freeing space for currently needed applications. Nano S Plus and Nano X generous 100+ application capacity essentially eliminates storage management for most users. Uninstalling applications doesn't affect underlying cryptocurrency access as holdings exist on blockchains accessible through reinstalling applications whenever needed.
Verify Connection
After installing initial applications, verify successful connection by checking device status in Ledger Live showing connected device model, firmware version, and available applications. Test connection functionality by navigating through device manager confirming application installations appear correctly. Successful verification confirms complete pairing ready for adding cryptocurrency accounts and beginning asset management through integrated hardware and software ecosystem.
Set Up Nano X on Ledger Live: Adding Accounts
With devices successfully paired, adding cryptocurrency accounts enables actual cryptocurrency management and transaction capabilities.
Create Cryptocurrency Accounts
Navigate to Accounts section selecting Add Account choosing relevant cryptocurrency from installed applications. Ledger Live synchronizes blockchain data generating addresses and scanning for existing transactions associated with device's private keys displaying current balances and transaction histories. This process might require several minutes for cryptocurrencies with extensive transaction histories or slower blockchain synchronization particularly for initial account additions.
The synchronization process queries blockchain nodes retrieving all transactions for addresses derived from device's master keys enabling complete balance calculations and transaction history reconstruction. For cryptocurrencies with no prior transactions, synchronization completes quickly simply verifying zero balances. Users with existing holdings might see balances populate as synchronization progresses discovering historical transactions and calculating current states.
Verify Addresses on Device
Account creation generates receiving addresses displayed within Ledger Live enabling cryptocurrency deposits. Always verify receiving addresses on hardware device screens before sharing preventing address substitution attacks from malware modifying displayed addresses in Ledger Live software. Click "Verify" button in Ledger Live causing same address to display on hardware device screen, then compare displays ensuring perfect matches confirming address authenticity.
This verification procedure proves critical for security preventing malware from displaying attacker-controlled addresses in application while users believe they're viewing legitimate addresses. The trusted hardware screen provides definitive source immune to software manipulation ensuring users share correct addresses with senders. Make address verification habitual practice before every deposit preventing losses from address substitution attacks targeting cryptocurrency transactions.
Portfolio Setup
With accounts created for held cryptocurrencies, configure portfolio view organizing accounts according to preferences. Ledger Live provides various display options including grouping by cryptocurrency type, sorting by value, or custom arrangements matching personal organizational preferences. The portfolio overview displays total values, individual asset balances, allocation percentages, and performance metrics providing comprehensive snapshot of cryptocurrency holdings.
Customize settings including preferred fiat currency for value displays, price data sources, and display preferences creating personalized cryptocurrency management environment. The consolidated view enables holistic portfolio management rather than fragmented approaches tracking different cryptocurrencies separately, facilitating informed allocation decisions and performance monitoring across entire digital asset portfolio.
Pair Hardware Wallet: Troubleshooting Common Issues
Understanding common problems and solutions enables quick resolution minimizing setup frustration.
Device Not Detected
When Ledger Live fails detecting connected device, systematic troubleshooting identifies root causes. Verify cable functionality trying different cables eliminating cable defects. Test different USB ports particularly direct motherboard connections avoiding hubs or front panel ports potentially providing inadequate power. Restart both hardware device and computer clearing temporary software states potentially interfering with recognition. Update or reinstall device drivers particularly on Windows systems sometimes requiring manual driver installation.
Check device firmware ensuring compatibility with current Ledger Live version as outdated firmware sometimes causes recognition failures. Temporarily disable antivirus or security software potentially blocking device communication through overzealous filtering. For Bluetooth connections, verify Bluetooth enabled on both devices, forget previous pairings and re-pair from scratch, and ensure devices within effective range without obstacles or interference.
Connection Failed
Even after successful detection, connection establishment might fail requiring additional troubleshooting. Verify device running genuine firmware through attempting manual genuineness check identifying counterfeit devices or compromised firmware. Ensure device fully updated to latest firmware version as connection protocols evolve requiring updates for proper communication. Check for application conflicts from other cryptocurrency wallet software potentially interfering with Ledger Live device access creating resource conflicts. Both Nano X and Nano S Plus devices follow the same connection process, ensuring consistent setup experience regardless of your chosen model.
Close unnecessary applications freeing system resources and eliminating software conflicts. Reinstall Ledger Live completely uninstalling and downloading fresh installation from official sources eliminating corrupted application files. Verify adequate disk space and system resources meeting minimum requirements preventing resource exhaustion affecting connection stability.
Driver Problems
Windows systems sometimes require manual USB driver installation for proper device communication. Download official Ledger USB drivers from ledger.com support section following installation instructions for your Windows version. After driver installation, restart computer enabling proper driver loading before attempting device connection. Verify driver installation success through Windows Device Manager showing Ledger device without warning symbols indicating driver issues.
For persistent driver problems, consult Ledger support documentation providing detailed troubleshooting specific to Windows versions and device models. Linux users might need to configure udev rules enabling proper device permissions following instructions in official Ledger documentation. Mac systems typically require no manual driver intervention with automatic driver loading handling Ledger device recognition without user intervention.
Register Hardware Wallet: Security Best Practices
Following recommended practices ensures optimal security maintaining comprehensive protection.
Safe Connection Tips
Always download Ledger Live exclusively from official ledger.com website avoiding third-party sources. Verify USB cables authentic or from reputable sources preventing compromised cables with embedded attack hardware. Never share PIN codes or recovery phrases with anyone regardless of claimed authority as legitimate support never requires sensitive information. Enable device auto-lock features minimizing exposure from unattended unlocked devices.
Verify all transaction details on hardware device screens before approval preventing malware-modified information in Ledger Live from causing unauthorized transactions. Use dedicated computers for cryptocurrency management when possible reducing malware exposure from risky computing activities. Maintain updated antivirus and security software on computers used for Ledger Live providing baseline protection against common threats.
Regular Updates
Maintain current firmware and Ledger Live versions accessing latest security improvements and feature additions. Enable automatic update notifications in Ledger Live alerting when updates become available. Schedule periodic update checks monthly ensuring awareness of new releases. Read update release notes understanding improvements before updating. Verify update sources ensuring genuine firmware preventing malicious installations.
Set Up Nano X on Ledger Live: Post-Setup
Completing initial setup represents beginning of cryptocurrency management journey.
First Transaction
After successful pairing and account creation, conduct small test transaction verifying complete setup functionality. Send small cryptocurrency amount to hardware wallet address confirming proper address generation and blockchain synchronization. Wait for transaction confirmation observing it appears correctly in Ledger Live with proper amounts and details. This test validates complete setup ensuring readiness for larger transactions without discovering issues with substantial amounts at stake.
Monitoring Portfolio
Regularly monitor portfolio through Ledger Live tracking balances, reviewing transactions, and analyzing performance. The application provides various analytical tools including price charts, allocation breakdowns, and performance metrics enabling informed investment decisions. Set up price alerts for significant market movements and review transaction history periodically verifying all transactions are authorized detecting any suspicious activity requiring immediate response.
For more security information, read our guide on secure crypto storage.
Frequently Asked Questions
Install Ledger Live from official website, connect device via USB or Bluetooth (Nano X), enter PIN on device, allow access when prompted, complete genuineness check, install cryptocurrency applications through Manager, and add accounts for each cryptocurrency. Process takes 10-20 minutes for first-time setup with guided instructions throughout.
Registration occurs during first connection when Ledger Live detects device, performs genuineness verification, and establishes authorized relationship. Process involves connecting device, authenticating with PIN, approving Ledger Live access on device screen, and completing initial configuration installing applications and creating accounts.
Download Ledger Live, install on computer or smartphone, connect Nano X via USB or Bluetooth, enter device PIN, approve connection on hardware, complete genuineness check, install desired cryptocurrency applications through Manager, add accounts for each cryptocurrency, and verify addresses on device. Complete setup enables full cryptocurrency management capabilities.
Common causes include outdated firmware, cable problems, insufficient USB power, driver issues, or software conflicts. Try different cables/ports, update firmware and Ledger Live, restart devices, disable antivirus temporarily, or reinstall Ledger Live. Check official troubleshooting guides for device-specific solutions if basic steps don't resolve issues.
Yes, internet connection required for downloading Ledger Live, synchronizing blockchain data, and checking balances. However, transaction signing occurs offline on hardware device. Initial connection and genuineness check require internet, while subsequent transactions need connectivity for blockchain broadcasting though signing itself remains offline maintaining security.
Yes, Ledger Live supports managing multiple devices including different models. Add additional devices through "Add Device" in settings following same pairing process. Each device maintains separate accounts with Ledger Live tracking all devices in unified interface. Useful for managing family members' devices or maintaining backup devices with different portfolios.